After the changes of Dec 18, 2012, GeoTIFF is no longer available for 1 and 1/3 arc sec NED DEM. From now on and until the next change, "Arc Grid" (aka ESRI Binary Grid) is the choice for TransDEM.
Please note that your need TransDEM 2.3.1 to open DEM files in this format.
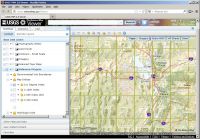
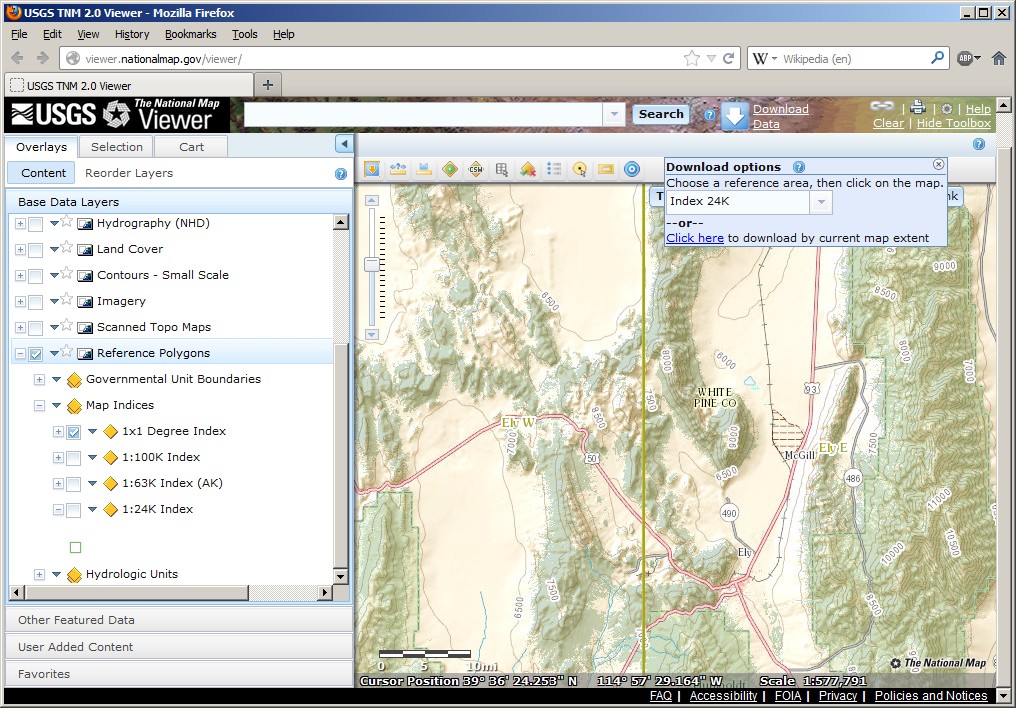
In the left pane, "Content" | "Base Data Layers", select "Reference Polygons" | "Map Indices" | "1x1 Degree Index". As the DEMs come pre-packaged in large 1x1 degree chunks, it is helpful to see how many of those your are likely to get.
You won't find "elevation" or "DEM" as content in the left pane. Instead use the map pane to zoom in to the area of interest:
In this example the W115th Meridian passes through our area just west of Ely, Nv. You can also check the cursor coordinates in the map pane status line.
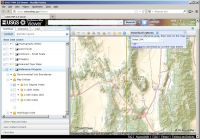
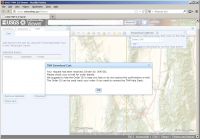
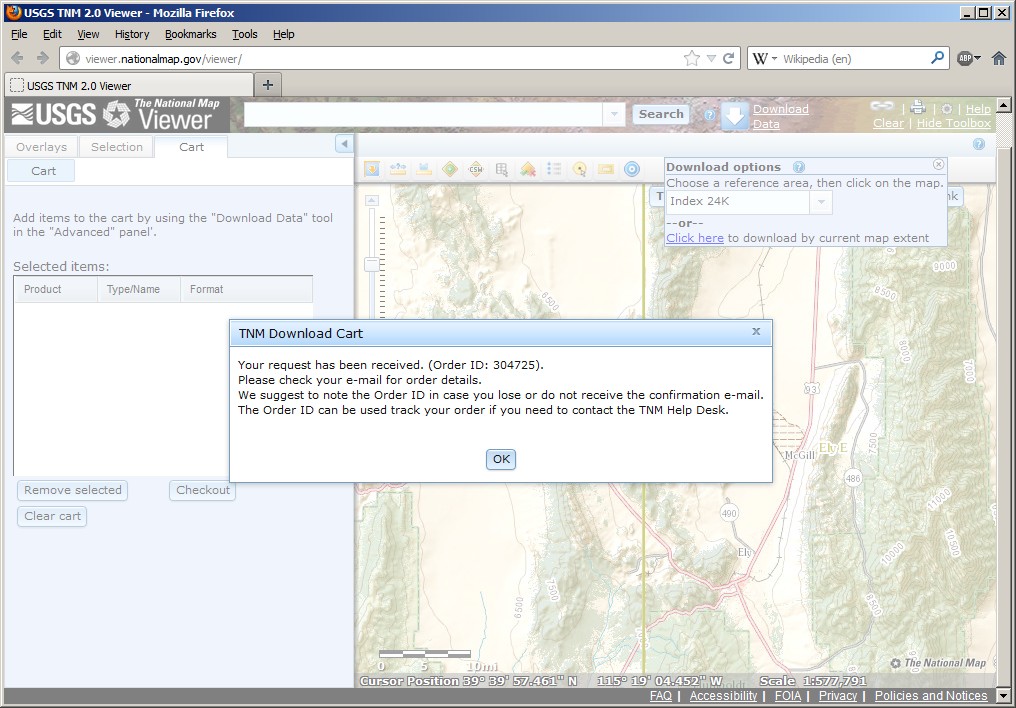
Click "Download Data". In the "Download options" pop-up, use "Click here" to download by current map extent.
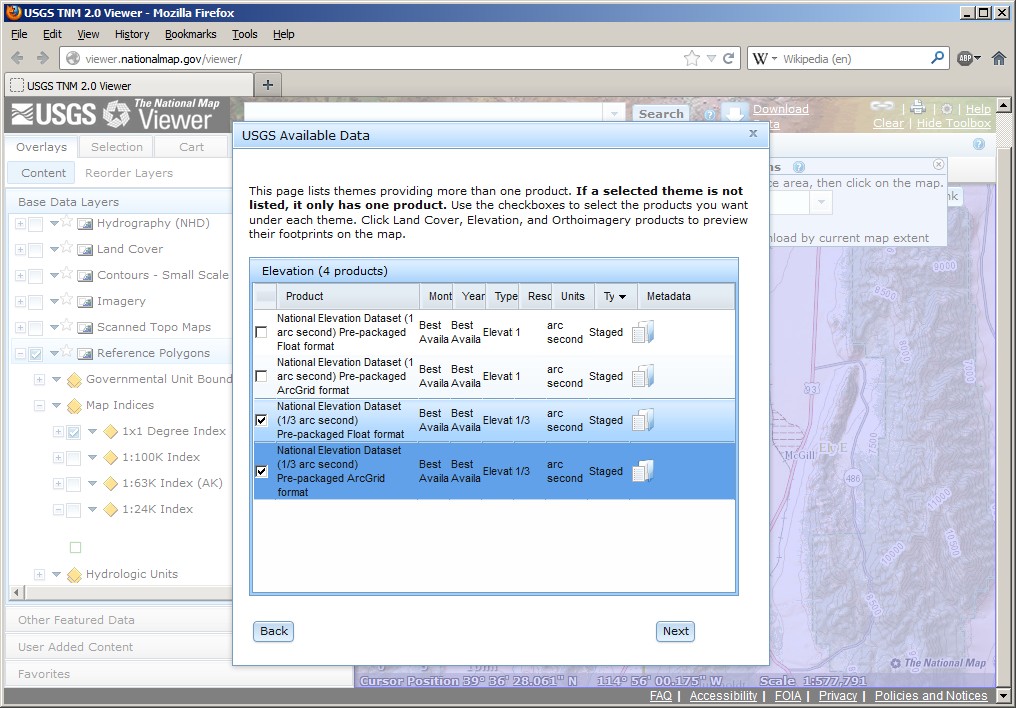
A new dialog pops up, presenting you an "Elevation" option for the first time. Select it and set the format to "ArcGrid". Click "Next".
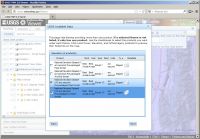
That next dialog will show you the available products. You should find 1 arc sec and 1/3 arc sec. Check all 1 or 1/3 arc sec "staged" items. These will become the 1x1 degree files.
Click "Next".
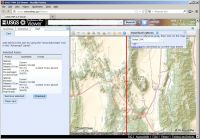
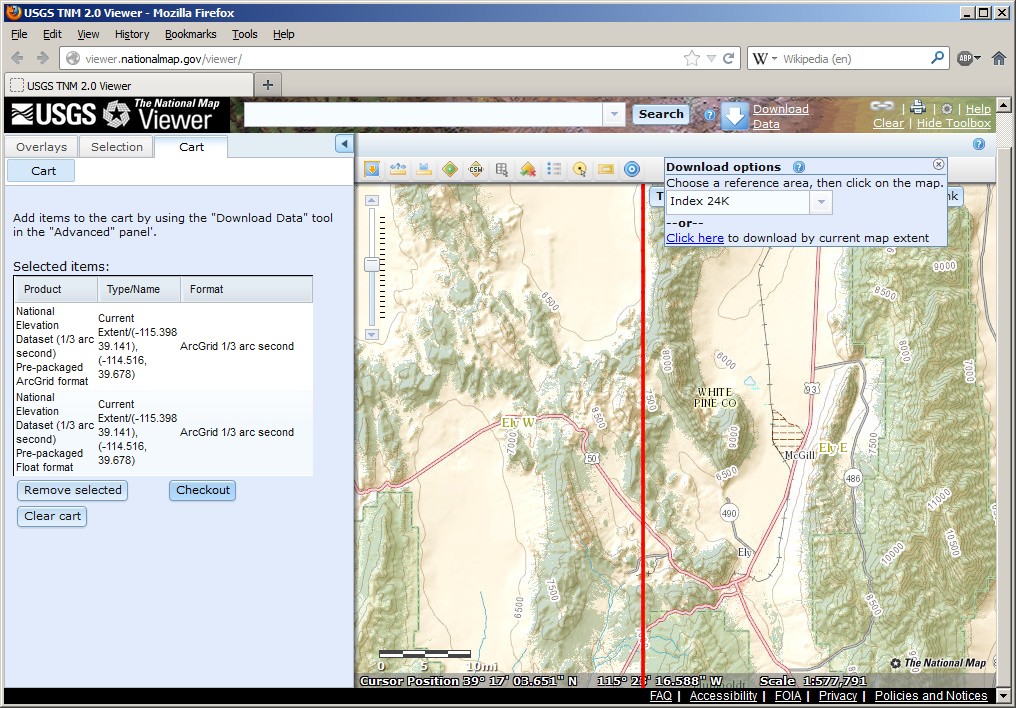
Your selection will appear in the main window in the side bar on the left. Inspect your selection and click "Checkout".
You will now have to enter your email address as you will get the download link by mail.
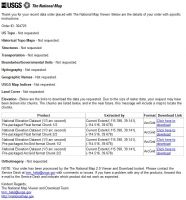
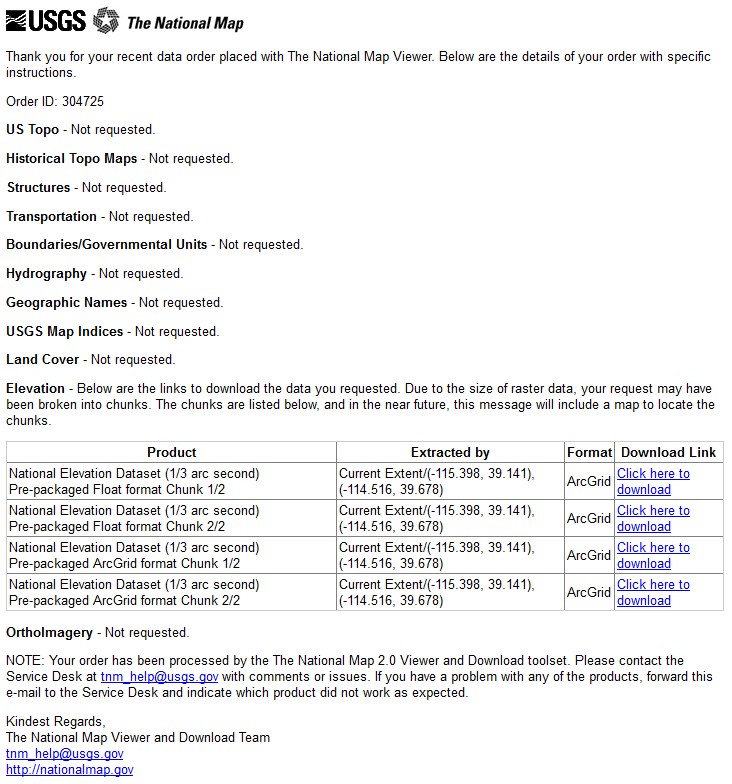
You should receive message from USGS.gov shortly which will have the download links. It will look like this:
Apparently, the format pre-selection "ArcView" did not really work. Only click the download links, where the product description explicitly says "ArcGrid". These downloads will be huge, Expect between 300 and 400 MB per 1x1 degree chunk for 1/3 arc sec resolution.
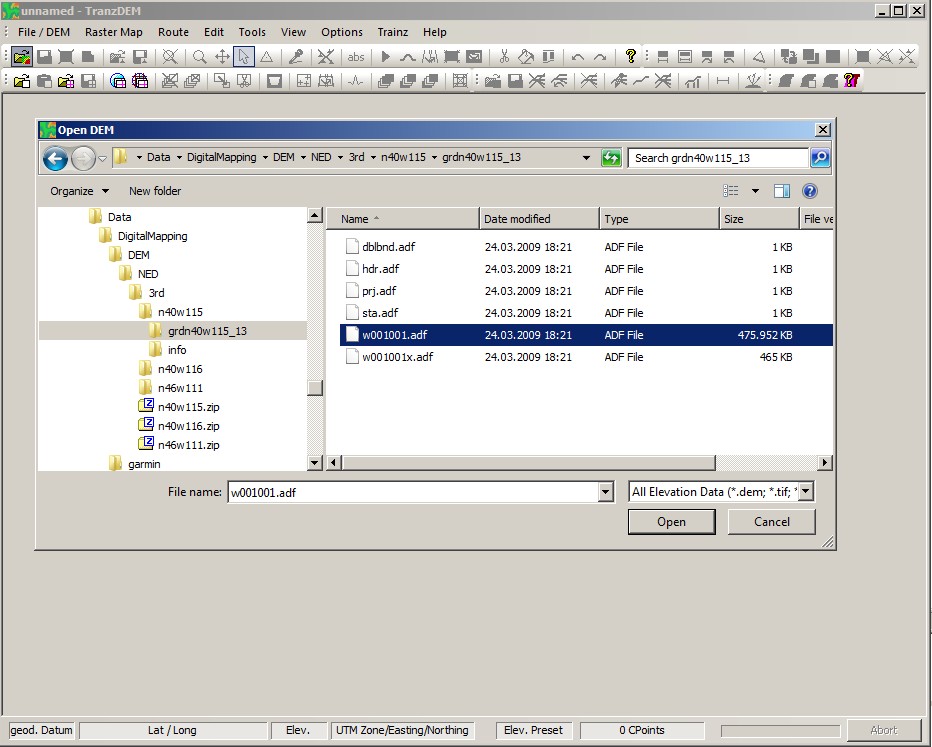
The files will be named by longitude and latitude, very similar to SRTM or ASTER GDEM. In this example I get "n40w115" and "n40w116". Once the download is completed, unpack the zip package(s). Each package will have two subdirectories which are both part of the ArcGrid / ERSI Binary Grid data structure. We are only interested in the grd* folder, "grdn40w115_13" and "grdn40w116_13" in my example.
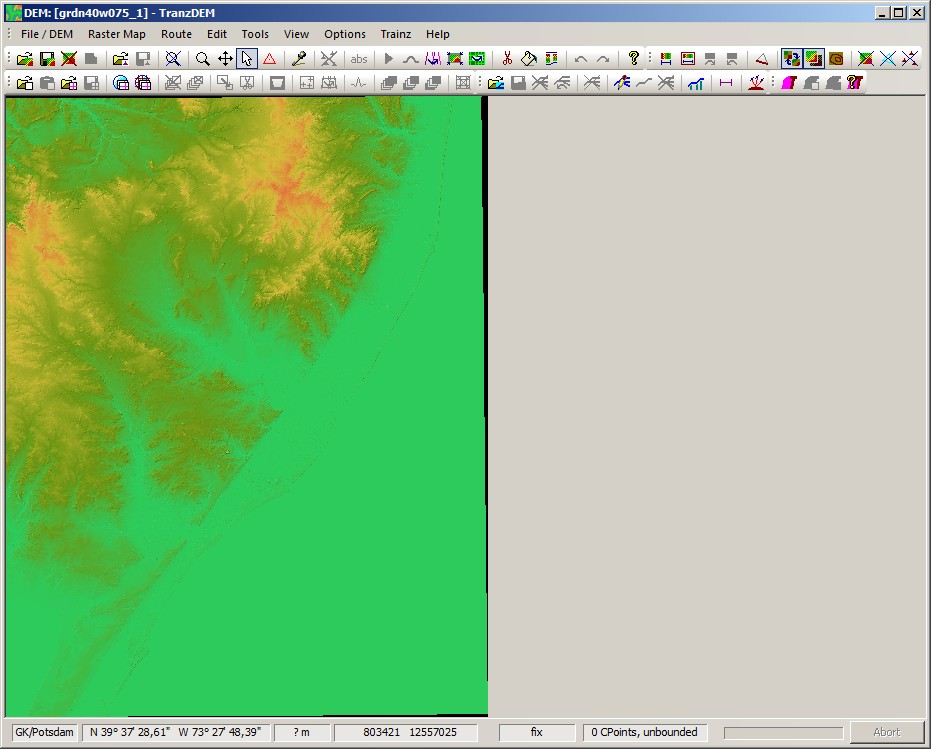
In TransDEM, open any of the ".adf" in that subdirectory.
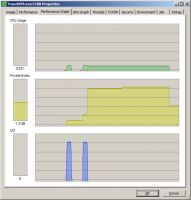
TransDEM will process all other files of this DEM automatically. With such large files you will notice the processing time. In the first phase of opening the DEM TransDEM reads the file data in raw format. Then the import dialog will pop-up, asking for grid width. Select 10m, it that's not the default already. (You may run into memory exhaustion with 5m). The second phase transforms the raw data into UTM. Depending on the number of CPU cores on your machine this phase may compute rather quickly, because TransDEM can parallelize this task.
Save the DEM.
You can try to merge two of the 1x1 degree 1/3 arc sec in TransDEM without prior clipping, but you will probably have to run TransDEM in a 64bit environment for this. My machine consumed 2.6 GB during the merge.
(Merging is still subject to optimisation, another task that can parallelized, in some future version of TransDEM).
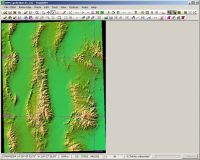
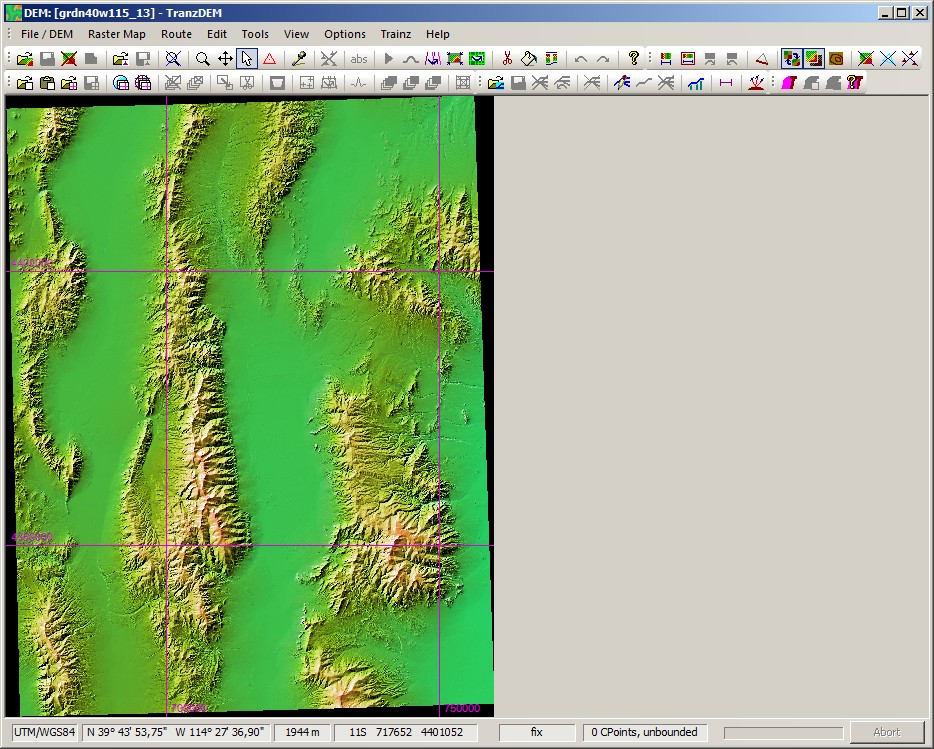
Final result with the two 1x1 degree DEMs merged and a map overlay for the Ely region:
When doing this on the Langhorne, PA huge DEM, I received a purely orange display where the DEM should have been in TransDEM. I thought it was a bad DEM and hated to have to try and download the ~400 MB again, but I zoomed in twice and the terrain appeared.
These huge files are bad and good in some ways. With just one download, I can now lays tracks over 1/2 of New Jersey!
When TransDEM displays that big orange plain, do a right click and check min and max elevation. It could be a void point which is not detected correctly and may be shown as a very low (negative) elevation. It that's the case, try to zoom in to a smaller area, pan around and watch the display for hopefully showing more than a single colour.
geophil wrote:Obviously there are no rail lines there, but will this situation prevent me from creating a valid route in Trainz of another part of that DEM?
No, the DEM should be okay apart from the fault(y) area. You can either crop the DEM and reduce to valid regions or try to isolate those minima and replace them with valid values.
Now, -2147483648 decimal integer converts to 80000000 hex in a 32bit double word and such a pattern is usually a placeholder for a so-called "void" point, an undefined elevation.
Most DEM formats have a definition for such void points. In the case of ESRI Binary Grid and usage by USGS there appears to be a mixture of floating point and integer representations in the file which may cause confusion. I will have a closer look at that.
Just a heads-up for those who are outside of the States and who are having troubles accessing the site: you'll need to enable English-US in your language settings. Details here:
This may sound like an overly simplistic question, but after zooming in on the area you want, do you simply select how many of the 1x1 boxes you want your route to cover? Either I read the tutorial wrong, or I read it too fast and missed a step somewhere between zooming in and selecting what you want.
...if I recall correctly, "-A", that is all you have to do, Once you select an area, it remains 'chosen' (highlighted, so you know you have already selected it) and when you move on to the next step, all of the areas you have selected appear in the list for the download process. Personally, I prefer to use the bounding box method but even then, the website's output seems to be, oddly enough, to provide the full 1° x 1° tiles that 'cover' the selected 'box' (rather than just the specified area)...