BackgroundThe UTM map projection splits the world into zones, to avoid distortion. Each zone is 6 degrees longitude wide.
Some projects in TransDEM may require to cross UTM zone borders because the region of interest reaches into an adjacent zone. TransDEM offers built-in functionality for this task by extending one UTM zone beyond its nominal range.
This tutorial shows how to utilise the cross-border features, particular for the case where a WMS demands the native UTM zone. Others WMSs may re-project zones themselves which will save a few steps.
A similar tutorial had been written before but was lost with the demise of the UKTrainz forum a year ago.
While working on it I discovered a glitch with the combination of transparent margins, which were added in TransDEM 2.0, and the much older UTM zone conversion itself. I fixed this and also added some improvements related to the internal handling of transparent margins. Hence, best results will be achieved with the latest patch, TransDEM 2.2.0.1.Introduction Assume we want to recreate part of the Denver & Rio Grande narrow gauge network in southern Colorado. Our main goal would be Durango to Silverton, which lies in UTM zone 13. For this, we have an extra WMS tutorial in the TransDEM main manual.
Let's also assume we want to re-lay track of the former Rio Grande Southern westward from Durango, which will expand our project into UTM zone 12. The right-of-way is long since gone but we can follow highway US160 instead which will be close enough.
The TutorialThis tutorial will concentrate on the actual cross-border task and will make a few simplifications to be able to start from scratch.
- Overview map
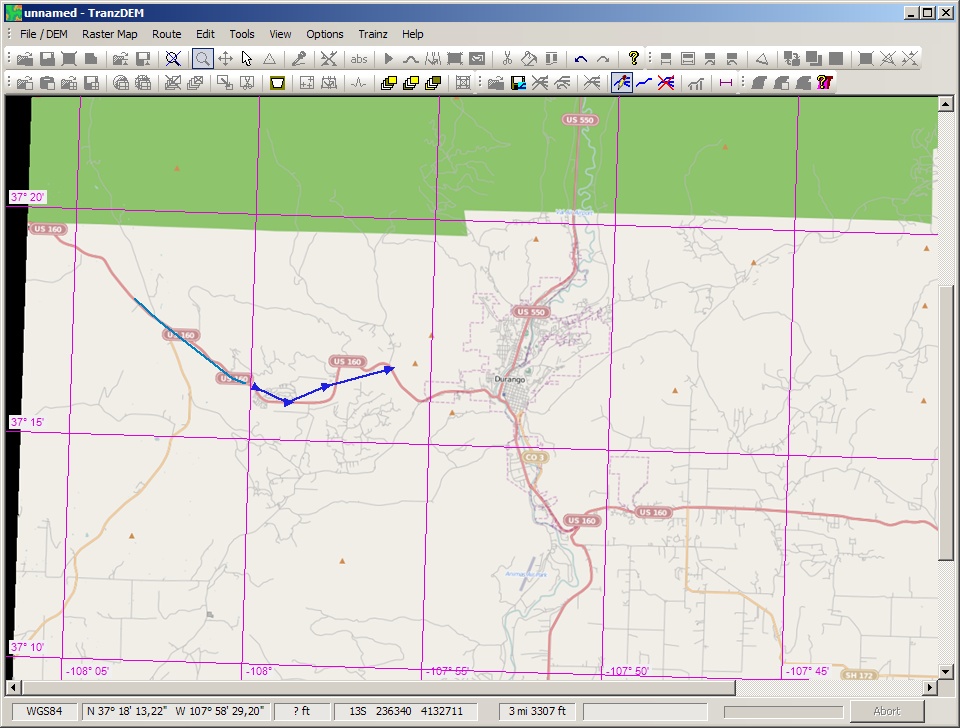
We begin with an overview map which we will acquire with the help of the TransDEM Map Tile Client. I select Open Street Map as the provider. Our headquarters will be Durango, Co, which we will find at 37° 15' latitude and -107° 50' longitude. We make the map clipping 1536 pixels in size and choose zoom level 12. We save the clipping as “OverviewMap12” in a new project folder “CrossBorder” which we create for this tutorial. TransDEM will put our map in UTM zone 13 (image 1).
Image 1: Overview map and vector path
- Vector path
We switch the coordinate system in TransDEM to “Geographic/WGS84”. The border between zones 13 and 12 is -108° longitude, just west of Durango. With the TransDEM polyline editor we draw a short path, roughly following US160 and crossing the 108th meridian. We put two of the points in the path very near the meridian, one on each side. Then we split the polyline right at the meridian, between these two points (image 1). We make sure that the path direction faces into each zone, right for zone 13 and left for zone 12. (Not strictly necessary but makes things easier.)
We save each half of the path to a file. The “Erase” and the “Undo” function will help here. We name the files “Path-zone13” and “Path-zone12in13”.
- Topo map clippings zone 13
Next we will acquire large scale topo map clippings via WMS, first for zone 13. Only “Path-zone13” should be loaded for this.
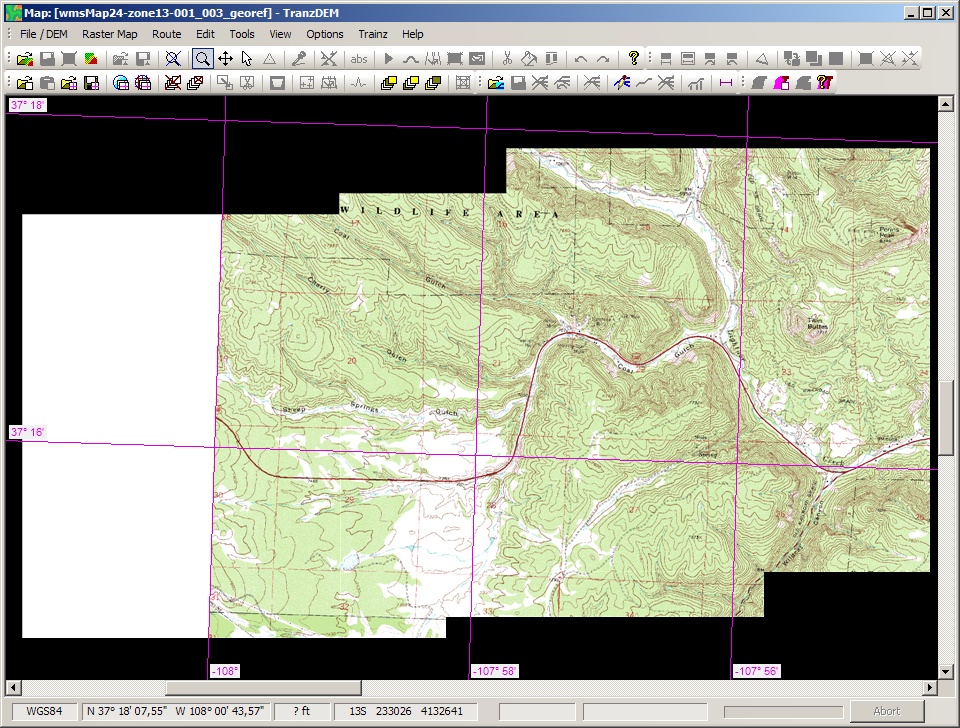
The topo maps will be USGS DRG 1:24k. We will use the TransDEM WMS client and obtain them from the USGS National Map WMS (requires TransDEM 2.2. MS Research Maps shall also work). We pick a single layer: “TNM_Digital_Raster_Graphics/DRG_24k/DRG_24k_z13” for zone 13. The coordinate system must be switched back to UTM/WGS84. Scale should be set to 1:30000 and image size to 1600 x 1600 pixels. We let TransDEM get the map clippings along the path and save them to “wmsMap24-zone13”. With a vector path as short as in my example we will get about three map clippings (image 2). The first one will cross the UTM zone border and only show white void left of it.
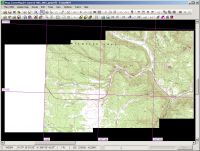
Image 2: Map clippings zone 13
- Transparent margins zone 13
We close the last map clippings until only the first one remains. With only one map image open we can apply Transparent Margins. One edge of the polygon mask should be on the 108th meridian (image 3). Clicking OK after closing the Transparent Margin function will save the map image. We add the other clippings again and save the lot as a new group which we call “wmsMap24-zone13-masked”.
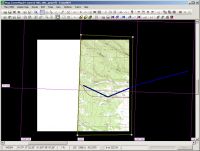
Image 3: Transparent margins zone 13
- Pseudo DEM to transfer to zone 12
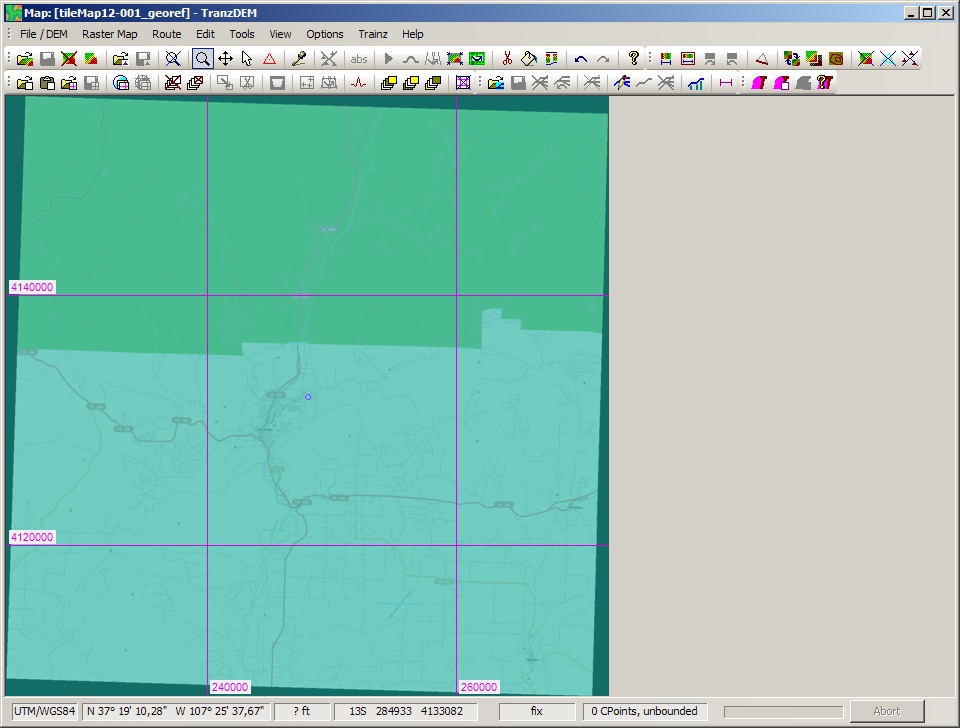
Now to UTM zone 12. As we can only acquire zone 12 map clippings if we are in zone 12 we will use the only apparent TransDEM function for UTM zone conversion which happens to be for DEMs.
We do not need a real DEM for this tutorial, a pseudo DEM will do. For this we open the overview map again, acquired with the Map Tile client earlier. We create this pseudo DEM with the “New DEM” function. We can reduce the grid with to 100m. We save the DEM to “pseudoDEM-zone13” (image 4).

Image 4: Pseudo DEM in zone13
This flat pseudo DEM will serve as our UTM zone reference. With only the DEM open we click “Transform UTM zone” which will bring us into UTM zone 12. We load our path “zone12inzone13” which magically will be re-projected into zone 12, too (image 5).
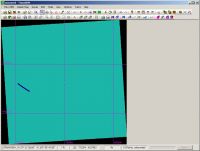
Image 5: Pseudo DEM in zone12 with path
- Topo map clippings zone 12
Now, finally, we can acquire our zone 12 map clippings via WMS. We make sure the coordinate system is UTM/WGS84 and the zone is now 12. This time our WMS layer is “DRG_24k_z12” (image 6).
The first clipping (with a path pointing west) shows the white margin for zone 13. Again, we use the Transparent Margin polygon to get rid of it. To enable the function we first need to close the latter clippings. After applying the polygon mask, we rebuild the map group by adding the other clippings again and save it as “wmsMap24-zone12-masked”. We close everything.
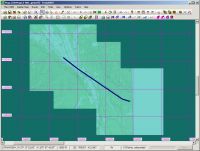
Image 6: Topo map clippings zone 12 with pseudo DEM
- Combining in zone 13
We open the pseudo DEM in zone 13 once more. And now we try to open “wmsMap24-zone12-masked”. TransDEM will display a message box to offer UTM zone conversion for the map group which we gladly accept.
This will re-project our zone 12 map clippings into zone 13. Hereby we have now extended zone 13 westward. You can see the different rotation angle for the converted zone 12 clippings (image 7). Most important, however, is seamless continuation of our route, US160 in our example.
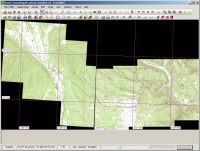
Image 7: Topo map clippings zone 13 and 12 combined in zone 13