A practical example for the new 2m LIDAR DEMs (see
here).
You download the files from the Environment Agency website:
http://environment.data.gov.uk/ds/survey#/downloadAs most UK geo data they are organized by grid squares. (As an adept TransDEM user of British data you will certainly know that TransDEM can display the grid square code – two letters plus shortened eastings and northings – in the status bar.)
For my example I chose grid square SD92, Todmorden, Upper Calder Valley, West Yorkshire, with the Rochdale Canal and the “Manchester and Leeds Railway”, later becoming the “Lancashire and Yorkshire”, passing through.
I prefer to pick locations for my experimenting I have visited myself and I came up here by narrowboat in 2009.
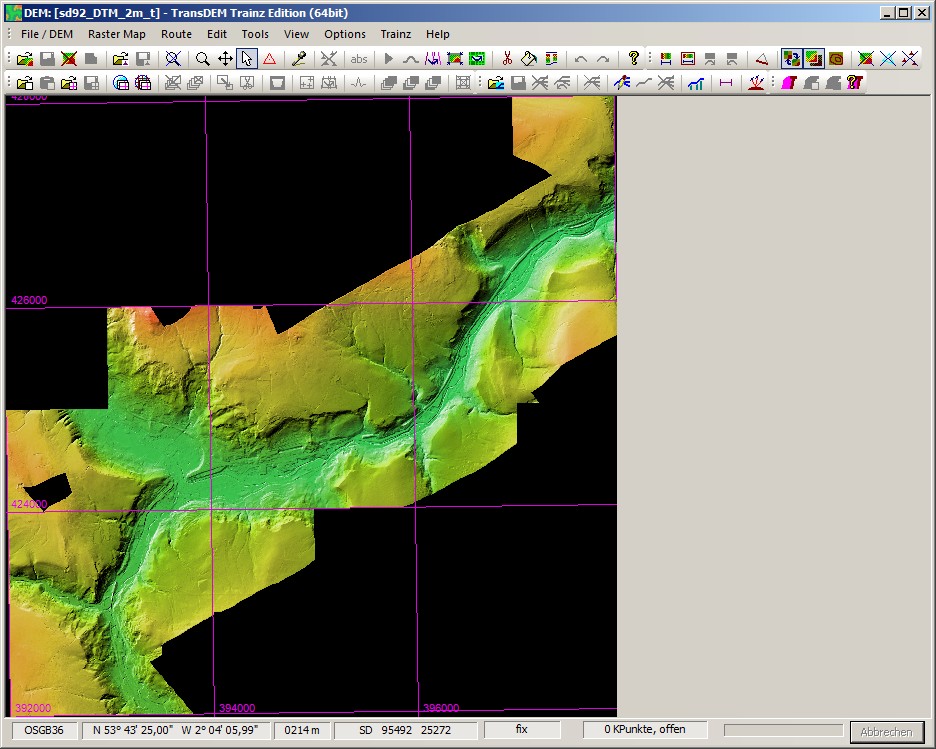
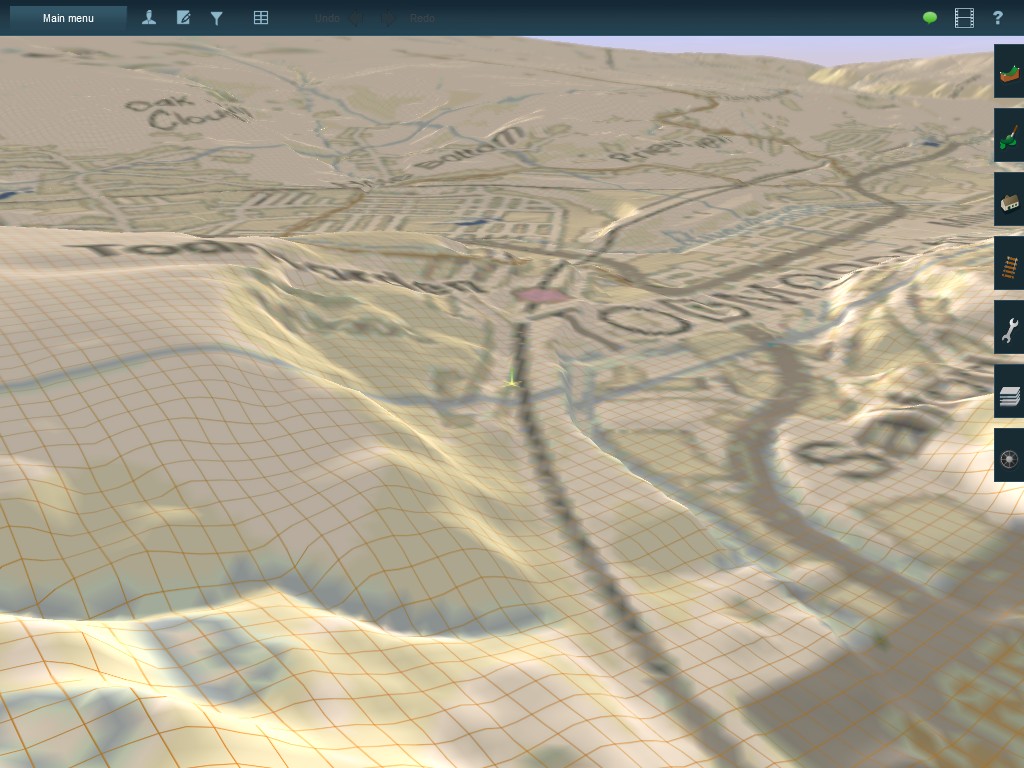
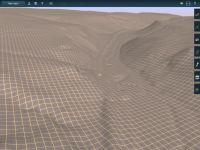
The first screenshot shows the 2m DEM for my project, about 6km long and 2km wide. Even at this rather low display scale you can clearly depict the railway line with its embankments, cuttings, tunnels and bridge gaps. (
Click on the image for full size.)

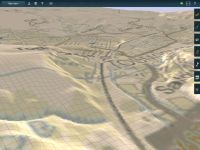
The 2m files are packaged as 1 x 1km, identified by grid coordinates. To find my way around I loaded an O/S Open Data 1:25000 “District” map for SD92 in the background (next screenshot below). I opened all LIDAR files I needed individually and saved the in TransDEM's .dem format, hereby automatically converting them to UTM. Using the “Add DEM” function I stitched them together to obtain the DEM shown in the first screenshot above.
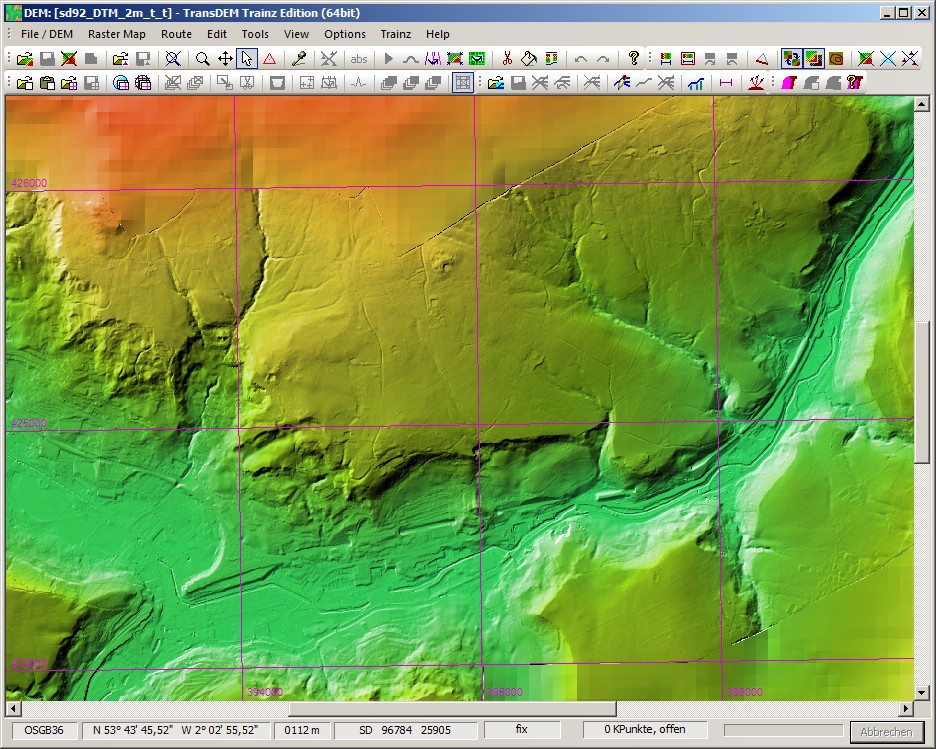
LIDAR coverage is limited. It concentrates on areas of cultivated land, largely untouched nature is left out. For our purposes we should fill-in on LIDAR, to avoid holes in the Trainz terrain. I will resort to O/S Open Terrain 50, the 50m terrestrial DEM, also available for free.
However, the standard “Add DEM” function in TransDEM cannot be used for filling in holes. When the “Add DEM” function merges two DEMs, it uses values from both sources for overlapping areas and computes an average. In our case, where O/S Terrain 50 also covers the same area as the LIDAR data, but at much less resolution, it will actually smooth the terrain, hereby giving away some of the crispness of LIDAR.
Therefore I have added a slightly modified “Add DEM” function to upcoming TransDEM 2.6 and named it “Fill up DEM”. When using the new function, the DEM added will only substitute the holes in the first DEM and never modify an existing elevation value. For this to work, both DEMs should have similar elevation values. Filling-up with orbital SRTM or ASTER will probably not be a good idea.
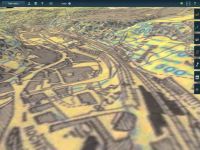
The next screenshot shows the result of filling up with the 50 m DEM. You can make out the larger 50x50 m DEM squares in the outer ranges and you can also depict the seams where the two DEM sources join. The shaded relief mode in TransDEM is rather merciless here, but these faults will appear much less prominent in Trainz.

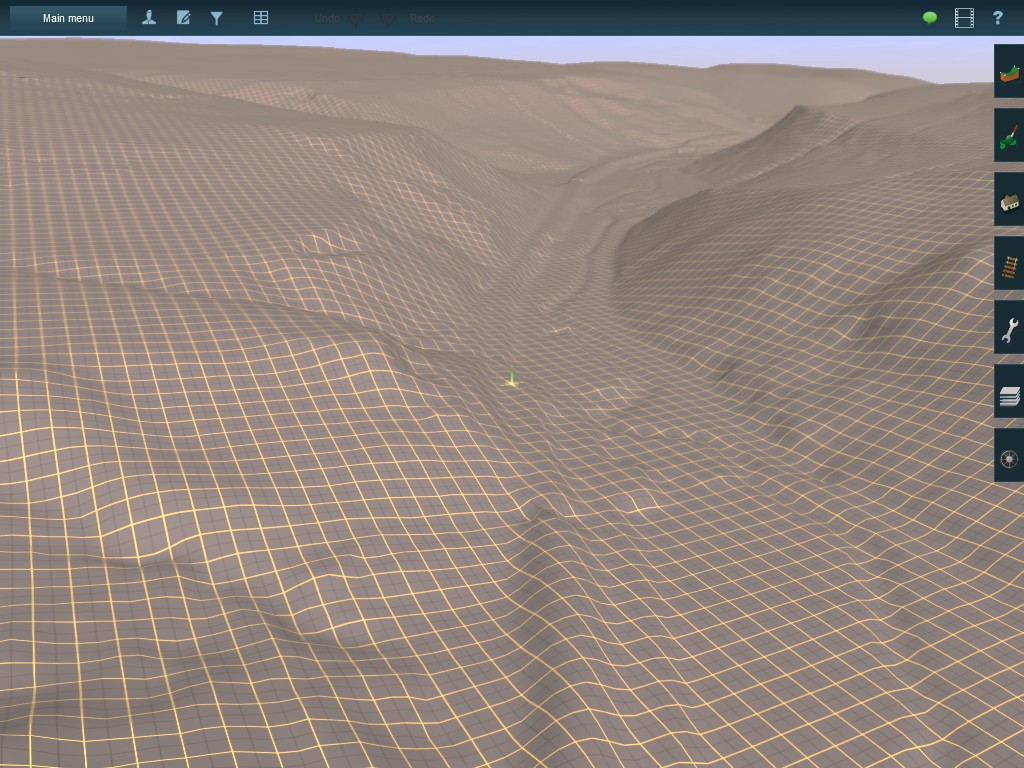
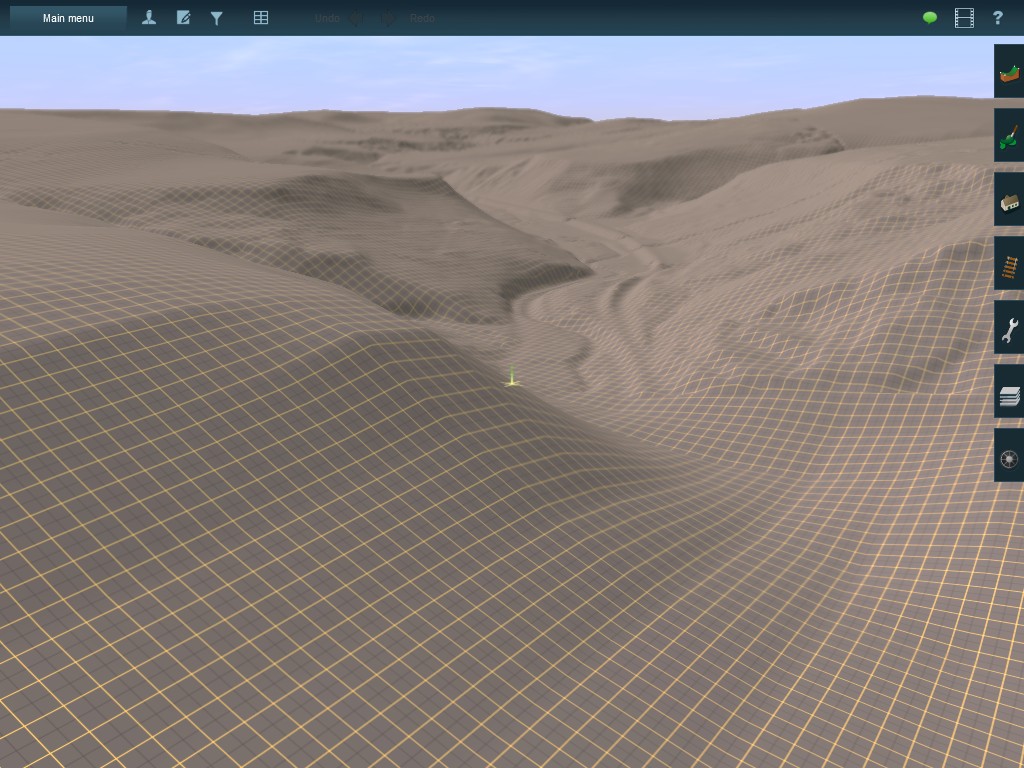
The following screenshots are all taken from T:ANE Surveyor. The first two in the series with the bare-bones DEM.
Most noticeable is the railway. The Calder River bed is also clearly visible.
It is not as crisp as in the TransDEM screenshots. This is because the minimum terrain vertex spacing in Trainz is 5m, not 2m as in the LIDAR source.
But it's so far better than the 50m spacing of O/S Terrain 50, as seen in the foreground in the next screenshot.

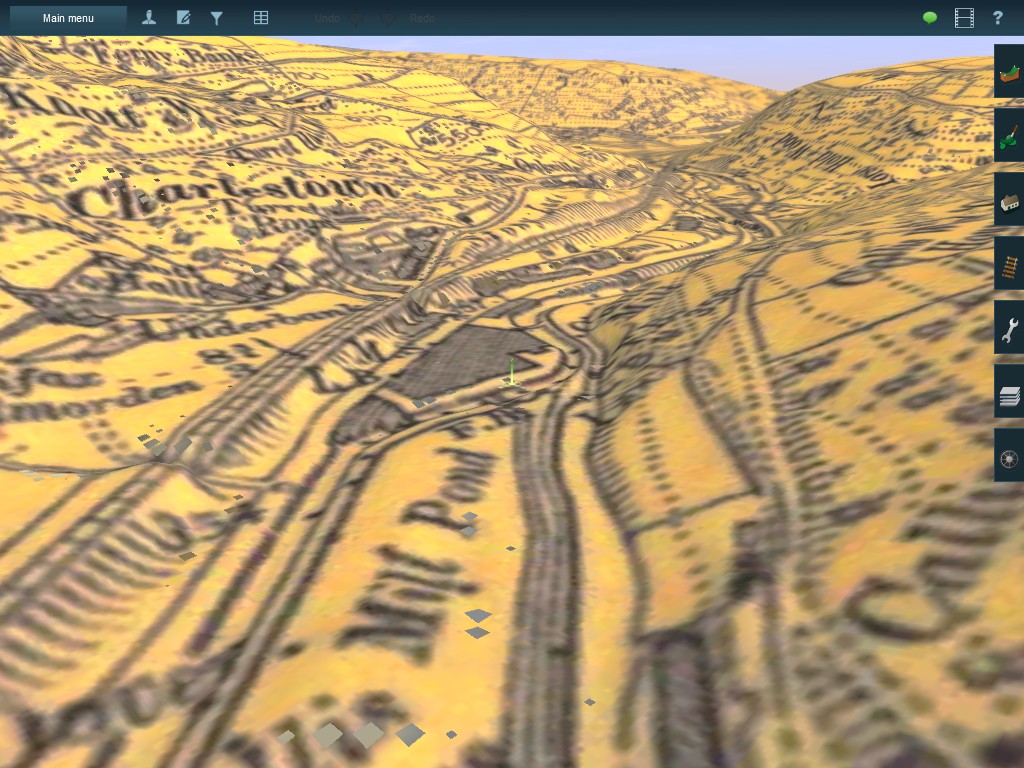
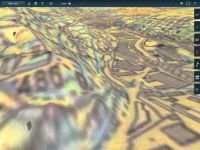
Let's add a map overlay, the historical 1:25,000 for the next image. Todmorden station. If you are familiar with the location you will identify the high retaining wall separating the newer railway from the older canal just west of the station (coming towards us in the image, right of the compass)
Three screenshots with 3D UTM tiles, the tiles also as a 5m grid. The map for these is the historical 6 inch series (1:10,560). Scanned from old paper sheets it comes out a bit yellowish.
First the Calder Valley with the railway embankment and bridge gaps.

Then, Todmorden station again and the retaining wall, just right of the compass.
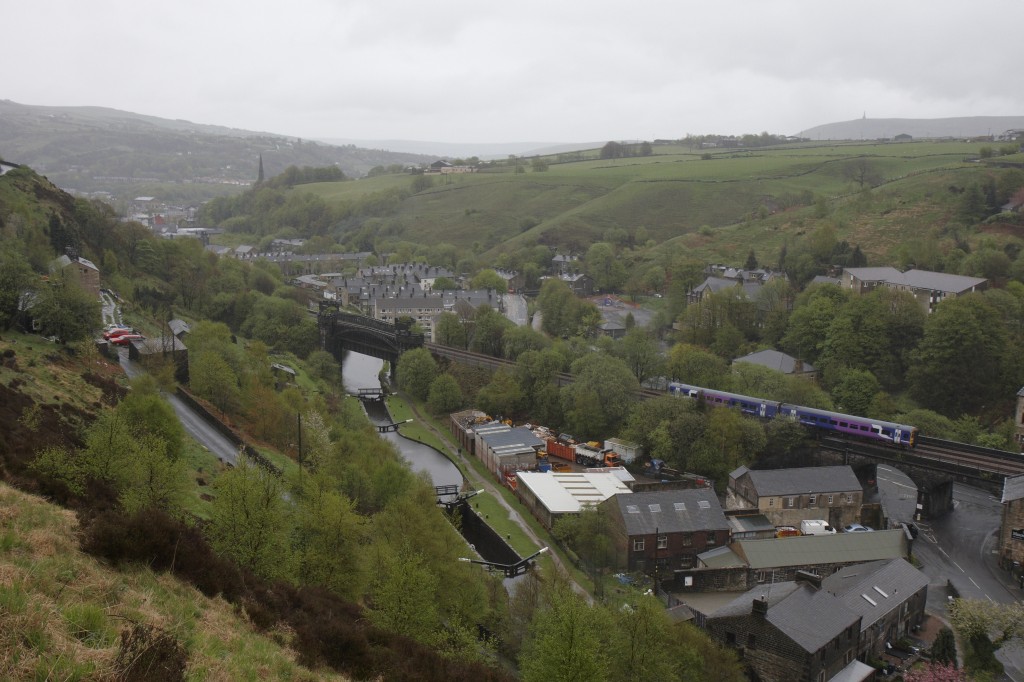
Finally, further up the valley, where the railway crosses the valley on an embankment and the canal passes under it.
Compare this last screenshot with the real world, a photo taken from almost the same spot with a similar angle (in pouring rain in spring 2009). Some of the details you will be able to identify in the Trainz scene are the railway bridge over the canal (as a gap), the one over the road , the two locks in the canal, the road up the hill below (compass) or the (wooded) steep cliff in front of the church spire.
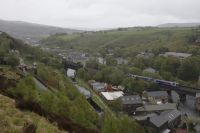
Remember, this is all achieved automatically, not a single Trainz ground vertex has been touched by any Surveyor tool so far. Admittedly, it's not perfect, the embankments will need some refinement, bridges need to be placed, etc. Route building skills are still needed.